



Deleting a page in Word is usually straightforward until it isn’t. You write a draft, realize you have three intro pages that just sit there doing nothing, and you want them gone. Simple, right?
Not always.
Microsoft Word doesn’t treat pages as physical objects. It treats them as a flow of text. When you hit delete, you’re not cutting a sheet of paper. You’re removing characters and formatting codes. If you’re a budding novelist trying to trim the fat off your manuscript, you need to know how the software actually works. Otherwise, you’ll be clicking delete for ten minutes while a single phantom page refuses to budge.
Here is how you actually delete pages, whether they are blank or full of text, without breaking your document.
How to Delete a Blank Page in a Word Document
Phantom pages are annoying. They happen when a paragraph mark or a page break gets pushed to its own line.
The fix is the same for Windows and Mac, just with different key combinations.
For Windows:
- Click anywhere in the document.
- Press Ctrl+Shift+8. This toggles paragraph marks (¶). You’ll see dots for spaces and ¶ for line breaks.
- Scroll to the blank page.
- Look for the culprit. It’s usually a cluster of ¶ symbols or a page break.
- Highlight those marks. Press Delete. Do it until the blank space is gone.
For Mac:
- Click anywhere in the document.
- Press Command+8. This shows the same paragraph marks.
- Find the blank page.
- Identify the extra ¶ or page break.
- Select it. Press Delete.
Once the marks are gone, the page disappears. Turn off the paragraph marks by pressing the same key combo again.
How to Delete the End-Paragraph Mark in a Word Doc
There is a paragraph mark at the very end of every Word document. It’s non-deletable. Word uses it to hold the document’s formatting structure. Think of it like a librarian who won’t let the last book fall off the shelf.
But sometimes, that mandatory end paragraph gets pushed to a new, blank page at the end of your file.
You can’t delete the mark itself. You have to make it small enough to fit on the previous page.
- Press Ctrl+Shift+8 (or Command+8 on Mac) to show hidden formatting.
- Select the paragraph mark on the blank page.
- Change the font size to 1. Press Enter.
- The mark shrinks. It snaps back onto the previous page. The blank page is gone.
- Hide the marks again by pressing Ctrl+Shift+8.
It’s a hack. But it works.
How to Delete a Page in Word Without Affecting Anything Else
Deleting a blank page is easy. Deleting a page full of text requires precision. You don’t want to delete the chapter before it by accident.
Use the Navigation Pane. It’s your map.
For Windows and Mac:
- Go to the View tab.
- Check the Navigation Pane box. A sidebar appears on the left.
- Click on Pages. You’ll see thumbnails of every page in your document.
- Click the thumbnail of the page you want to delete. Word jumps directly to it.
- Click at the very beginning of that page.
- Hold down Shift and click at the very end of the content on that page. Everything in between is highlighted.
- Press Delete or Backspace.
If a blank page remains, you’re dealing with hidden formatting.
- Click the ¶ symbol in the Home tab.
- Look for extra paragraph marks or page breaks. Delete them.
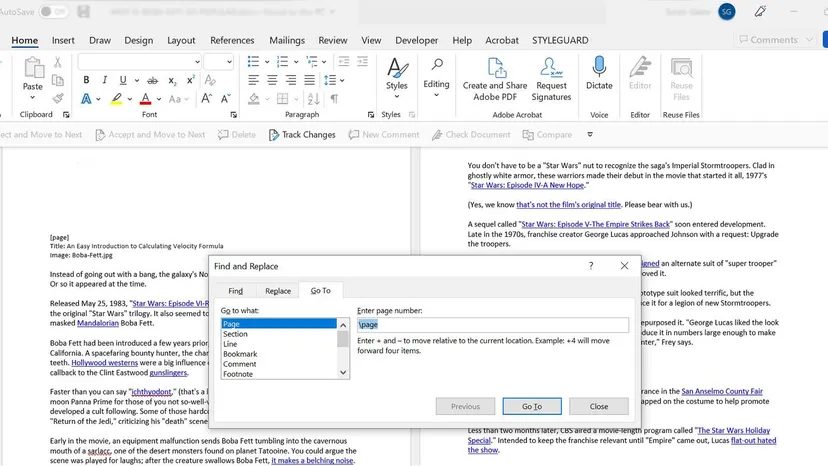
- If a blank page persists, check for section breaks. Go to Layout > Breaks. If you see a section break, place your cursor just before it and press Delete.
Be careful. Section breaks control headers, footers, and column layouts. Deleting one can mess up the formatting for the entire rest of your document.
Afterward, check your layout. Adjust margins or spacing if the remaining content looks weird.
Troubleshooting and Managing Page Breaks in Microsoft Word
Page breaks are the most common cause of unwanted blank pages. They are manual commands that force text to start on a new page.
If you’re seeing gaps where you don’t want them, here is how to fix it.
Identify the break:
Press Ctrl+Shift+8 (or Command+8 ). Page breaks appear as a dotted line labeled “Page Break” or “Section Break.”
Remove unnecessary breaks:
Scroll to the break. Click immediately before it. Press Delete (or Backspace ). The text below will jump up to fill the space.
Move a break instead of deleting it:
Sometimes you need the break, just not there.
- Place your cursor before the break.
- Cut it (Ctrl+X on Windows, Command+X on Mac).
- Paste it (Ctrl+V or Command+V ) where you actually want the page to start.
Use automatic breaks:
Manual breaks are rigid. Automatic breaks adapt to text flow.
Go to Layout > Breaks. Choose Next Page for a section break that behaves better with flowing text.
Check for compatibility issues:
If you are working with a document created in an older version of Word, the formatting codes might be messy. Ensure your file is saved in the current .docx format. Older formats can cause page break glitches that newer versions handle differently.
Word is forgiving. But it doesn’t read your mind. It reads codes. If you remove the code, you remove the page. If you leave the code, the page stays.
Which is easier? Knowing what you’re looking at, or clicking until something happens?